
Use ADB to install an APK from your computer
Published: October 7, 2026 · Updated: October 8, 2026
ADB (Android Debug Bridge) lets your computer install apps on your phone over a USB cable. It's the method of choice when the phone's browser can't download the file, when you're setting up several phones at once, or when on-device installs keep failing for unclear reasons. It takes a little setup, but the actual install is one command. This guide covers Windows, macOS, and Linux.
What ADB is (in plain terms)
ADB is a small command-line tool from Google's Android developer kit. Your computer runs commands; your phone, connected by USB with debugging enabled, carries them out. For installing apps, ADB simply pushes the APK to the phone and tells Android's package installer to do its job. It's the same installer you'd see tapping the file by hand.
You don't need to be a developer to use it. You need to download one folder of tools, type a few commands exactly as shown, and turn one setting back off when you're done. If command lines make you nervous, the beginner sideloading walkthrough installs the same file without any of this.
When ADB is the right tool
- The phone can't download the file itself: broken browser, no mobile data, restricted network. Download on the computer, install over USB.
- You're setting up multiple phones: one download on the PC, then
adb installon each phone in turn. - On-device install keeps failing mysteriously. ADB gives you actual error messages instead of a bare "App not installed."
- You want to verify the file on a computer first. Checking the SHA-256 fingerprint is easier on a desktop; see our verification guide.
ADB is not needed for a normal single-phone install. It's simply the most reliable fallback when the easy path breaks.
There's also wireless ADB (Android 11 and newer): Settings → Developer options → Wireless debugging lets your computer connect with no cable at all. It's convenient, but for a one-off install the cable is simpler. Wireless pairing adds its own troubleshooting surface. Mentioning it here so you know the option exists if your USB port is damaged.
Step 1: set up the phone
Enable Developer options
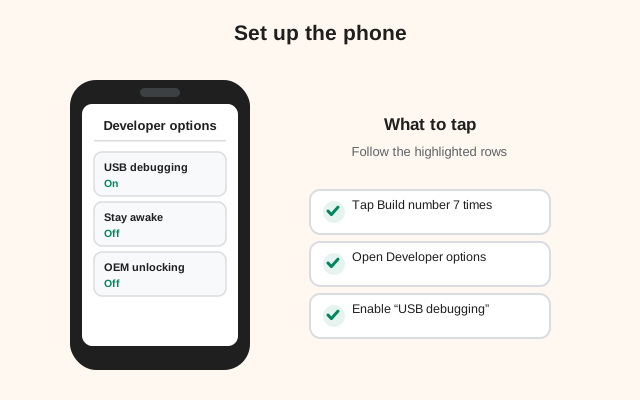
Go to Settings → About phone and tap Build number seven times. You'll get a "You are now a developer" message.
Turn on USB debugging
Go to Settings → System → Developer options and enable USB debugging. This is the only developer setting you need.
Connect the phone to the computer
Use a data-capable USB cable (some cheap cables only charge). On the phone, choose File transfer / PTP mode if asked (not "Charge only").
Authorize the computer
The first time you connect, the phone shows an "Allow USB debugging?" prompt with the computer's fingerprint. Check Always allow from this computer and tap Allow.
Keep the phone's screen unlocked during the install. Some phones refuse ADB installs while locked, and the authorization prompt obviously can't be tapped on a locked screen. Plug in, unlock, authorize, and leave it unlocked until you see Success.
Step 2: set up the computer
Download Platform-Tools (Google's official ADB package) for your system. It's a free ZIP, no installer:
- Windows: download the ZIP, extract it to a folder like
C:\platform-tools, and open a Command Prompt or PowerShell in that folder (Shift + right-click → "Open PowerShell window here"). - macOS: extract the ZIP, open Terminal,
cdinto the platform-tools folder. - Linux: extract,
cdin, or install via your package manager (sudo apt install adbon Debian/Ubuntu), which skips the download entirely.
Then confirm the phone is visible:
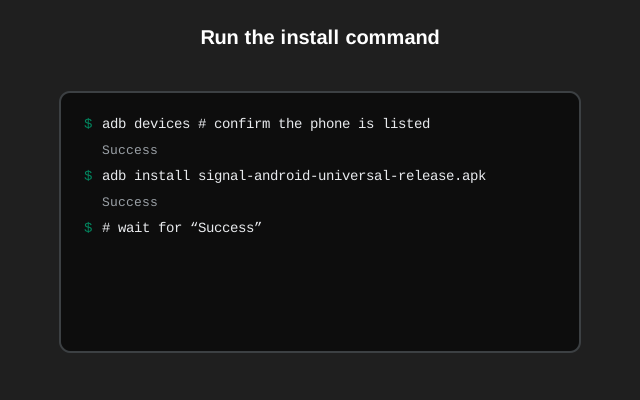
adb devices
You should see your phone's serial number followed by device. If it says unauthorized, check the phone screen for the allow prompt. If the list is empty, see the driver notes below.
If you'll use ADB more than once, add the platform-tools folder to your system's PATH. Then adb works from any terminal without cd-ing first. On Windows that's Environment Variables → Path → New; on macOS/Linux, an export PATH="$PATH:/path/to/platform-tools" line in your shell profile. Optional, but it turns a chore into a reflex.
Download Signal's APK on the computer from signal.org/android/apk and put the file in the platform-tools folder (or note its full path).
Step 3: run the install command
The command is exactly this, with your file's name:
adb install Signal-Android-website-prod-universal-release-8.29.3.apk
(Use the real file name of whatever you downloaded. Version numbers change over time.)
ADB will print Performing Streamed Install and then Success. That word is the whole result: the app is now on the phone, installed through the normal system installer with the normal permission screen already handled. Open Signal on the phone and register your number.
Useful variants:
adb install -r file.apk: reinstall, keeping the app's data. Only works for the same signing key; it will not override the Play-vs-website conflict.adb install -g file.apk: grant all requested permissions at install time. Handy for unattended setups; on a personal phone, review permissions yourself instead.
Setting up several phones? You don't need to re-download anything: leave the terminal open, plug in the next phone, run adb devices to confirm it's the only device listed, and run the same install command. One adb gotcha with multiple phones plugged in at once: commands need -s <serial> to pick a target, so do them one at a time and avoid the confusion.
Driver and connection notes per system
| System | Common issue | Fix |
|---|---|---|
| Windows | Phone not listed at all | Install your phone maker's USB driver (Samsung, Xiaomi, etc. each publish one), or the universal Google USB driver. Try a different USB port and a known data cable. |
| Windows | "unauthorized" forever | On the phone: Developer options → Revoke USB debugging authorizations, unplug, replug, and accept the fresh prompt. |
| macOS | Command not found | You're not in the platform-tools folder. cd into it first, or use ./adb with the leading dot-slash. |
| Linux | Empty device list / permissions error | Add udev rules for Android devices, or run the one command with sudo to test. The distro-packaged adb usually handles this. |
| Any | Install fails with INSTALL_FAILED_ALREADY_EXISTS | The app is already on the phone. That's the Play-vs-website signature conflict, not an ADB problem. Uninstall first (after backing up). |
adb kill-server followed by adb start-server, then adb devices again. This restarts ADB's background service and clears most wedged states.After installing: turn USB debugging off
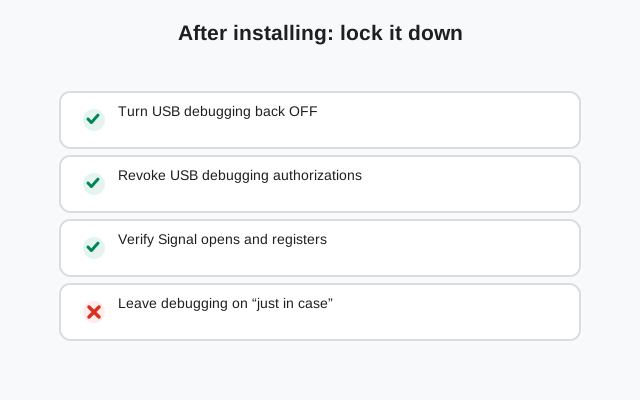
Don't skip this. USB debugging is a powerful door into your phone, and there's no reason to leave it open:
- Unplug the USB cable.
- Go to Settings → System → Developer options and turn USB debugging off.
- Optionally, turn off Developer options entirely with the master switch at the top of that screen.
Your phone is now back to its normal locked-down state, with Signal installed and updating itself through the website build's own updater. If you ever need ADB again, the whole setup takes two minutes.
Frequently asked questions
Is ADB safe to use?
Yes. It's Google's official developer tool. The only risk is leaving USB debugging enabled afterward, which is why this guide ends with turning it off.
Do I need to root my phone for ADB install?
No. Installing APKs via ADB works on completely stock, unrooted phones.
Can ADB install over the Play Store version of Signal?
No. ADB uses the same system installer and the same signature rules. A different signing key is rejected exactly as on-device. Back up, uninstall, then adb install.
adb devices shows nothing. What's wrong?
Almost always the cable (charge-only cables are common), a missing USB driver on Windows, or the authorization prompt not yet accepted on the phone. Work through the table above in order.
Do I need my computer for every update?
No. ADB was only the delivery method for this one install. The file you installed is the normal website build, so it updates itself in-app exactly like any sideloaded copy. Your computer can stay in the drawer.
Where do I download ADB itself?
Google's Platform-Tools ZIP: the official distribution. Avoid third-party 'ADB installer' bundles, which sometimes ship outdated or modified binaries.
from Signal's official site — file hosted by Signal, not by us.